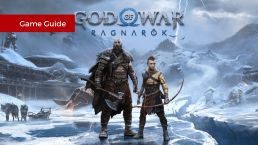
Game Guide | God of War Ragnarok
Achievement / Trophy guide
Overview:
– Estimated achievement difficulty: 4/10 (on Story Difficulty, can switch difficulty at any time in gameplay settings)
– Offline: 36 (1 , 4
, 4 , 15
, 15 , 16
, 16 )
)
– Online: 0
– Approximate amount of time to  Platinum: 40-50 hours on Story Difficulty / 50-60 hours on Balance Difficulty / 60-70+ hours on No Mercy Difficulty
– Minimum number of playthroughs needed: 1
– Missable achievements : 0, nothing tied to trophies or 100% completion is missable, can still return to all relevant locations after the story in free-roam
– Does difficulty affect achievements: No, can do everything on the easiest difficulty and use accessibility options
– Unobtainable/glitched achievements : No
– PS4/PS5 Autopop & Save Transfer: Yes, but only from PS4 > PS5 (not from PS5 > PS4), it autopops all trophies including Platinum instantly upon loading the PS4 save on PS5
– PS4/PS5 Crossbuy: Yes but only if you buy the more expensive Crossbuy Edition for €69,99 (There is a cheaper PS4-only version for €59,99, can be upgraded to PS5 for €10)
– Free-Roam / Level Select after Story?: Yes, there is free roam after story, can return to all areas that are relevant for trophies and 100% completion.
– Extra equipment needed: No
– Release Date: November 09, 2022
Welcome to the God of War Ragnarok Trophy Guide! The game has a very similar structure to the 2018 God of War game. For platinum you basically need 100% completion. All Collectible Types are tied to trophies, except for Lore and Buried Treasures. There are 418 Collectibles in total. You can’t complete most areas on the first visit during the story because you’ll be missing the required skills. All the skills you need are unlocked automatically from the story. Some Collectibles don’t spawn at all until you’ve beaten the story. It’s best to focus on the story first and clean up everything after. Nothing is missable, you can return to all areas that contain collectibles after the story. The story takes around 20 hours and 100% completion another 20 hours (on easiest difficulty). There are no difficulty-related trophies, everything can be done on the lowest difficulty. There’s nothing you need to watch out for during your story run, just have fun and enjoy the game as you wish.
Step 1: Finish Story [20 Hours]
Finish the story on any difficulty. Playing on the lowest difficulty setting is fine. You can also make use of the Accessibility Settings to make it even easier.
Nothing that’s tied to trophies or 100% completion is missable. All relevant areas that contain collectibles can be revisited after the story in free-roam. A handful of story-specific sections become unavailable but they don’t contain anything for completion or trophies, so it’s of no consequence. If you forgot to pick up items dropped by enemies they are automatically placed in the blue chest at the blacksmith. There’s no way to miss anything.
Just like the previous God of War game, it’s impossible to get all Collectibles on the first visit. You won’t have the necessary abilities, they are unlocked later in the story. Some collectibles don’t spawn at all until after the story (Remnants), they cannot be found until you reached the endgame. So don’t worry about Collectibles for now, it’s impossible to complete them during the story. Grab what you find by yourself, then backtrack for the rest after the story.
Step 2: Follow a Collectible Guide for 100% Completion [20 Hours]
Even though the trophy list doesn’t outright mention some collectible types, you basically need everything. For example, you also need all 48 Odin’s Ravens to get one of the Relics/Hilts as a reward. To fight Hrolf you must get all Berserker Gravestones. To get all Apples/Horns you need the Nornir Chests. To fully repair the Amulet of Yggdrasil you need the Legendary Chests because they contain the parts. Accessing certain areas requires doing Favors so they are needed too. 100% Completion will also help you reach Gear Level 9 (maximum) to stand a chance against the Level 9 bosses Hrolf and Gna.
The only collectible types not directly tied to trophies are Lore and Buried Treasures. Everything else is needed for trophies.

The Bear and the Wolf
Collect all Trophies
Game Guide | Far Cry 6
Achievement / Trophy guide
Overview:
– Estimated achievement difficulty: 3/10
– Online:
– Approximate amount of time to 1000![]() / Platinum: 25-35 Hours
/ Platinum: 25-35 Hours
– Minimum number of playthroughs needed: 1
– Missable achievements : Yes, 1 Hidden In Plain Sight (no longer possible after end of story)
– Does difficulty affect achievements: No, can do everything on easy
– Unobtainable/glitched achievements : No
– Extra equipment needed: No

Conquistador![]()
Unlock all trophies

Trophy Guide | Death Stranding
Achievement / Trophy guide
Overview:
– Estimated difficulty: 3/10
– Offline: 57 (1 ![]() , 1
, 1 ![]() , 2
, 2 ![]() , 59
, 59 ![]() )
)
– Online: 6 *PlayStation Plus isn’t required – Greatest of the Great Deliverers, A Helping Hand, Giver of Gifts, Great Deliverer, A Shout in the Dark, Building Bridges
– Approximate amount of time to Platinum: 125-175 Hours
– Minimum number of playthroughs needed: 1
– Missable achievements: 0 (No Missables)
– Glitched trophies: 0
– Does difficulty affect achievements: Yes, must play on hard difficulty for trophy “Growth of a Legend”.
– Free-Roam / Level Select after Story?: Yes, Free-Roam after Story. All areas, deliveries, collectibles, trophies remain accessible after story.
– Extra equipment needed: No
This trophy guide is as spoiler-free as possible. The Roadmap / Trophy Guide only discuss basic gameplay functions and nothing about story events. The official story trophy descriptions have been edited to hide potential spoilers.
Welcome to the Death Stranding Trophy Guide! Death Stranding is not a hard platinum, but a time-consuming one. The one trophy that makes it long is “Best Beloved” for maxing out all facilities. This means doing lots of deliveries for them. The biggest help to cut down on time is to make use of Ziplines which are unlocked later in the game and let you zip from one line to the next without being slowed by your cargo. Luckily, there are no missable trophies. The list consists of some story trophies, crafting, 56 collectibles, and deliveries. There is a difficulty-related gold trophy “Growth of a Legend” which requires you to play on Hard. Fortunately, outside of combat the difficulty doesn’t matter so it’s really not as bad as it sounds (pretty much the same as Very Easy difficulty). Most of your time will be spent maxing out all facilities. The Story takes 40 hours or so, depending on how many side deliveries you do along the way. Everything is still doable after the story in free-roam.
The first step is to play through the story. It’s recommended you play on Hard difficulty because it’s mandatory to get “Legend of Legends” S-Rank in Premium Deliveries (Trophy: Growth of a Legend). You can’t get this rank on Normal or lower difficulties. For enemy encounters and boss fights you can switch to Very Easy in the game options. You can change the difficulty whenever you want and as often as you want, it doesn’t void anything. Nothing in this game is missable.
Difficulty only affects enemy encounters (of which there are very few). For actual deliveries (which make up 99% of the game) there is no noticeable difference between “Very Easy” and “Hard”. Hard difficulty is really not hard at all. Feel free to switch between Very Easy and Hard to try it out and you won’t notice a difference during Deliveries. You can switch difficulties at any time.
Enjoy the Story how you wish. It’s highly recommended you do all “Orders for Sam” (Primary Quests) and not just the mandatory story ones (that have an orange glow behind their name). These are all pretty important as they lead to new UCA Facilities. You can also do some Side Deliveries to level up Facilities but it’s more time-effective to build out a zipline network first and come back after the story.
This brings us to the biggest time savers to turn this from a 250h plat to a 125h plat: In the early game, frequently use vehicles (faster than walking) until you unlock Ziplines (story-related). Always carry a few “PCC Lv. 2” crafting items to build out a Zipline network. The ziplines let you travel immediately from one Zipline to the next and will save you well over 100 hours towards platinum. You won’t have to walk anywhere and BTs (the ghostly enemies) can’t reach you while on a Zipline. Prioritize Ziplines early on and you will save a lot of time later. The only limiting thing is that when going to new areas you can’t put ziplines there until you connected the area to the UCA network. You do a lot of backtracking in the story though, so when you do, you can place more ziplines on your way back.
Playing through the Story takes roughly 40 hours, more or less depending on how many side orders you do.
After the story, open the map and press  to see what facilities you haven’t found yet (they will be greyed out). There are 39 facilities. You get most of them automatically from the story.
Now level them all up to 5 stars (Trophy: Best Beloved) and combine it with the 80 Premium Deliveries. See trophy “Growth of a Legend” for a detailed explanation.
For this step you have to play on Hard Difficulty! That’s because “Legend of Legends” S-Ranks aren’t obtainable on Normal or lower difficulties. After the story there are no more forced enemy encounters so Hard difficulty is no different from Very Easy. For Deliveries you won’t notice a difference between the difficulties.
Make sure you have a good network of Ziplines put in place between the facilities you want to level. Also play online so you see the Ziplines of other players and don’t have to use up your Chiral Bandwith (this is a “feature” that limits how many structures you can have on the map at the same time). Since online structures don’t cost you Chiral Bandwith, they are very good to have around.
Maxing out all 39 facilities is by far the most time-consuming task. Some facilities (like Veteran Porter, First Prepper, Mountain Knot City) take countless deliveries to max out. It’s best to focus on the huge deliveries with 300kg weight or more. Those reward you a lot more likes than multiple small deliveries would. Because you travel by zipline the weight won’t slow you down.
This step takes about 70-130 hours. 70h if you travel by Zipline almost exclusively, 130h if you don’t have an effective zipline network that connects all facilities.
There are 56 Memory Chips. They are the Collectibles in Death Stranding. You can’t get certain Memory Chips until you leveled up their nearest facilities. Then you get an email from the facility manager telling you about “a shiny object”. Reading that email makes the collectible spawn in the game.
Because you leveled up all facilities in Step 2, you now have access to all emails to make the collectibles spawn. You also get the last missing fabrication plan for “Homo Faber” from Memory Chip #31.
At this point you will have gotten almost all trophies naturally while maxing out the 39 facilities. And because you got the Collectibles done you also have all fabrication plans. That should only leave you with a few structure building trophies (fully upgrade all structures, craft all equipment). Those won’t take long, now that you got lots of resources from the fully-leveled facilities.

Greatest of Great Deliverers ![]()